May was just as busy as I thought it would be... We had two major events (a white tie event at the university and the high school prom) as well as the start of the wedding season these past few weeks, so the entire staff has been working superhard. I've worked 12-16 hours a day, 7 days a week, and my boyfriend has come to the shop after his regular work to help me out. It has been loads of fun, I've met so many wonderful people and it's been deeply satisfying to see both the gentlemen and the ladies in their attires after we've fitted the garments! While I've enjoyed it, and look forward to next year's crazy May, I'm also a wee bit grateful we're moving into normal summer - meaning loads to do, but hopefully I'll be free from work one day each week, and I'll just need to work late evening once or twice a week.
All right, eunough about work! I started drafting this post in January/February, but never came around to publish it. So here's a little story of how I fitted my new dress-dummy!
A few years ago I got a dress dummy my grandmother had found discarded. It's been a huge help over the years regarding hemming and for storing delicate projects over night. But I never got around to making it a proper body double, as the back at it's smallest was still too wide and too long. This of course also made it a bit inaccurate when I measured hemlines.
Apparently I'm a very, very lucky girl, for my mother decided she didn't need her old dressdummy and gave it to me! It's a size or two smaller than the red one, meaning the back can be made to fit. Here's how I went about to shape it!
First I set it to a measurment close to my own (a bit smaller), making sure that none of the other measurments got distorted along the way.
One important part was getting a correct distance between the bust apex'es (tricky to pad out later).
Second, I draped a close fitting sheath for the dummy, so I'd have something to sew the filling to. Also kept the lines of filling smooth over the "gapes".
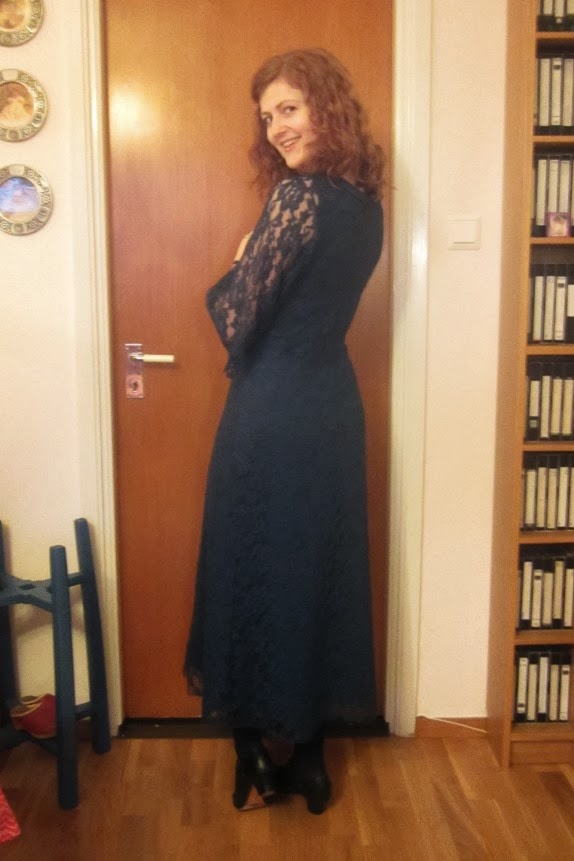
Third, I made a skin tight sheath for myself, using my block patterns and reducing the wearing ease from them. Some say it's better to have the dummy with the ease included, but I think that depends on what I want to make. For jersey and bias cut I think it's easier to see how it will really fit on my measurments, not my measurments plus ease. And wovens are easier to get on and off the dummy when it's in my size =)
After finalizing the sheath in toile fabric, I cut it out in a home
decor brocade that's unlikely to stretch over time and that can also
withstand pins.
Pretty tight, huh? Let me tell you, there was no way to sit down in this thing =)
Fourth, stuffing the dummy! Gee, it was a lot to stuff! One gets a whole other take on body proportions when skulpting them out on a dress form... For the bust I used an old bra, carefully measuring as I went along to make sure the bust measurment equaled mine.
I had really planned to sew all the filling to the bottom canvas sheath, but I was so tired of this project and just wanted to SEW something that I left it, promising myself that I will fix it. Later. Hmm, perhaps I need to set a date for that? Before fall? Yes, that sounds like a plan =) I also need to add more padding, it's a bit too small right now. As you can see below, the sheath is much looser on the dummy than it is in the pics of me above.
The outer sheath closes with a zipper down the back, making it easy to go in and adjust the filling if it starts to slide around. Also, both sheath and filling is fairly easy to adjust should I gain or lose a couple of pounds.
There we go! A dress dummy that can actually function as a fitting aid, help me measure hems (I took the hem-guide from the red dummy, this one's has been lost over time) and that doesn't look too bad on it's own.
Love, Erika
Showing posts with label Sewing. Show all posts
Friday, 6 June 2014
Sunday, 29 December 2013
The Christmas dress
I hope you're all having a happy holiday! I've been staying at my mother's in Stockholm, celebrating Christmas the swedish way (traditional swedish food and hanging out with the family on Christmas eve). Also, there's been the usual running around Stockholm to meet up with everyone... =)
Last year I bought 2 metres of jersey and 2 metres of lace and figured I'd make it into a Christmas dress for this year. I came close to stumbling on the finish line here... I started drafting the jersey on Friday evening the 20th, sewed the jersey on Saturday morning, drafted and toiled the lace on the afternoon/evening. Sunday I packed for Christmas and sewed the lace-dress.
The bottom layer is a plain jersey dress, without sleeves. The top layer is more interesting - it's lace cut on bias. The lace has no stretch on it's own, but it's a loose weave lace, so it has some natural stretch due to that. But as I didn't want to join the two layers, I also didn't want the opening a waistseam would require. This was my solution:
A bias cut diamond shape in the side. I first got this idea from one of the dresses in the Hollywood exhibition at Albert & Victoria museum in London last year. I'm not sure how period accurate it is, but they did use paneling during the early 30s.
The front was also a new to me: I made a high cowl neck, with the bodice pleated to a midriff piece.
The skirt is my by now trusty bias A-line pattern. The back is also cut on the bias.
One of the trickiest part was figuring out the pattern layout, so that the weave strength on both sides of all seams matched each other.
This was a really fun project, and I'm thrilled I managed to get it done in such a short time!
Happy holidays!
Love, Erika
Monday, 9 December 2013
A dress for blues dancing
As per usual my carefully laid sewing plans this fall went straight to… *erhm* They didn’t work out as I had planned. Or at all. That meant my grand vision that included a gorgeous rayon, matching chiffon with embroidery and sequins, and of course a smashing 30s silhouette, that vision had to be put on hold for a later date if I wanted a finished dress to wear to the dance instead of just an idea. So what to do instead?
I wavered between the three drawings to the left above, but even though I decided for the one to the farthest left, it was never a “Yay! I’m going to love this dress!”. At first I tried to ignore it and stick to my chosen path, but as I picked out the jersey I bought in London last year (intended for a bluesdress) and the pattern pieces, a new dress just seemed to grow out of what was in front of me. The result was the dress on the right, minus the split (when test-dancing the dress, I realised I didn't need the split).
Ever had that happen; that a project seems to change itself, and take an ok idea to something totally different? The end result was a lot more suited to the occasion, to the fabric and to what I really really deep deep down wanted. It’s strange what can come out of being true to one’s gut feeling and just follow the intuition. I’m not sure I can say I drafted this dress, it more or less drafted itself.
The entire front bodice got an overlay of lace, pleated to the neckline. The skirt was cut (on-grain) from my bias 30s skirt pattern, so made long + slim. Sleeves also got a cover of lace.
The best is the back! Covered with lace, the jersey beneth dives into a deep V. This is a style I’ve dreamed of wearing, forever! But with my bust, skipping the bra just isn’t an option. However, when I realized the Glamour Corselette I also got in London would be ideal under the thin jersey skirt, my mind raced to the conclusion “Holy Moses, I can make a deep back!”. As a deep back isn’t ideal when dancing - the lead’s hand goes right over there, and as I’ve discovered myself when leading followers wearing tank tops with spaggetti-straps, it really is a much more pleasant experience to have some fabric between hand and back – I kept the full lace back, and just cut out the jersey.
Due to the cut out back, my slips wouldn't work, so I made a lining from knit stretch lining.
Dress inside-out with the back lining visible...
...and the front.
Did I lose something with this change of plans? Yes and no. The original jersey dress would have been an allround Little Back Dress, usuable for many occasions, from dancing to dinner parties. The dress that I ended up making is a pure Blues Dance Dress (ok, I may wear it for New Years Eve as well ; ) ). However, a multi-purpose allround LBD wasn't really what I desired deep down. I wanted a dress that walked the narrow line between classy, but not "funeral". Elegant and simple, but interesting. Sensual, but not sexy nor slutty. A bit like blues dancing =)
Also, from a more practical point of view, this jersey isn't of a very high quality and I fear it wouldn't make it long as a much-in-use allround LBD...
And I did my first attempt on fingerwaves!!! The rest of the hair is brushed through and pinned up in a faux bob.
The dress was fantastic to dance in, and we had a wonderful Blues Dance Night! Above is me and my sister Kajsa during clean-up after the dance. We didn't coordinate or anything, but I love how our outfits matched with black jerseys, textured bodices, matt skirts and long-ish sleeves =)
All for now!
Love, Erika
Tuesday, 19 November 2013
Sewlution on the way! And resources for learning shirtmaking =)
It's been awfully quiet over here, but it's been a busy beehive behind the scene =) So much going on, but not a lot to show for it as it's a project that has turned out to be just as tricky as I feared. So what am I up to? It's really all about this:
Karen from Did you make that? posted an idea past January: A jar with sewing-resolutions. Anyone could put their name and resolution in the jar, and at the end of the year everyone would be asked to answer: had they fulfilled their chosen task? I took this as an opportunity to give myself a kick in the derriere about facing a project I’ve long wanted to tackle but has been a little bit afraid of: drafting and sewing a menswear dresshirt.
In fact, my exact words were:
“During 2013 I will draft and sew a
men’s shirt.
Oh dear, cuffs, collarstands, buttonplackets… Not to mention fitting a man! I know about FBAs and hips, but fitting guys is a whole other page. This will be a real challenge for me! Time to order those books and get reading.”
Still a bit afraid of the project, I
managed to procastinate all spring – always saying “I’ll just make this first,
then I’ll have plenty of time to start the shirt-project after that”. Did I
start? Of course not! ;)
Then summer was all of a sudden over
and I knew that it was now or never or I would have to confess to the mistress
of the jar that I had fled my promise. I’m certain there would have been an
easier way to do this: buy a pattern and follow the instructions. I never do it
the easy way, it’s a curse…
In sewing there’s always a hundred
ways to do something. I’m indecisive when it comes to choosing ice-cream
flavors at a store, and choosing a sewing method is a lot more complicated.
I’ve also found that one source almost never provides me with all the details and options I’d
like. So my prefered method is to read up on the subject in different ways,
books, blogs, on-line classes, pattern instructions (if I have any nearby),
studying existing garments etc. Ask mom is always high on the list as well =)
Then I look at all the (often conflicting) information and puzzle together the
pieces that makes the most sense to me, my available tools and materials, and
the vision I have in mind of the finished garment.
In this case I found the following
resources the most valuable:
Metric pattern cutting for Menswear – Excellent drafting book, pattern came out looking good and needing
just minor adjustments (mostly style issues, a few fitting issues but less than
RTW poses). However, I wouldn’t recommend this as your first pattern drafting
book, it skips steps and is at places pretty hard to keep track of. Personally,
I felt the included seam allowance made it harder for me to make alterations,
but that might be ‘cause I’m used to working with “net”-patterns (no SA included).
If you’ve dabbled a little bit in drafting before, this book is a winner. Just make sure you get the latest edition! The earlier one's apparently have a distinct 80s feel to the cut...
Shirtmaking by David Page Coffin – The standard book on shirt sewing. This book
would require a review-post on it’s own. Let’s just say mr Coffin writes an
extensive guide to sewing your own shirt. I found many things to love about
this book, but I also have some issues with it.
Peter from Male Pattern Boldness shirt-sewalong – great for browsing and getting a
first idea of how it all goes together. Peter works from a pattern and partly
just refers to the pattern instructions, so lot’s of steps are missing (unless
you choose to sew from the same pattern), but it was a huge help to me to see
more detailed step-by-step photos of the trickier parts.
Craftsy class The classic tailored shirt – Class led by Pam Howard. Pam works from a
Kwick sew pattern, but the class is set up so you don’t need the pattern.
Excellent and thorough, it does take some hours to view all the lessons.
Totally worth it, in my book. I’d do a few things differently from how the
class suggests (like not working with an all-around 1,5 cm SA, amongst other things), but seeing it done on video is for me the
best way to learn (after IRL-classes). For instance, both Coffin and Peter explains
the yoke-trick with words and images, but it wasn’t until I saw Pam do it that
I finally got it.
Pam from Off the cuff’s collar-tutorial – cool way of turning the collar points.
Andrea from Four square wall’s post on sewing shirt-stands – always like
different takes on the same detail.
Coletterie
has two great tutorials on sewing flat felled seams – without a special fellingfoot and with one.
So where am I in the process? I’ve
drafted the pattern, made a toile and fit it, made my adjustments on the draft,
and traced the pattern to fresh tracing paper, adjusting the SA from the
overall 1 cm given by the drafting instructions to the SA's that will actually be needed. The shirt has been cut out from a tea-dyed linen and I'm halfway through the assembly process. It's still a long way to go, and I already know details that needs to be altered or sewn differently. My boyfriend very sweetly says that of course he'll wear this shirt, but I'm not sure it will be wearable. Still, when learning a new skill, something has to be the first attempt!
Second half of November and still a way to go... Wish me luck! I so very much don’t
want to have to explain myself to the mistress of the jar… ; )
Love, Erika
Wednesday, 25 September 2013
Completed: two 30's outfits!
Inspired by my love for the 30s look, my realisation that maybe I've been avoiding the 30s for all the wrong reasons, and of course all the lovely comments from you guys on whether I should try it, I decided before summer to make a 30s summer outfit with a skirt and a blouse. "Summer?", you may be wondering, "but Erika, it's fall now!"
I know, I know! But... well, I didn't get done in time... and the skirt fought back... and somehow I ended up making a second skirt + top outfit...
Alright, outfit number one:
A bias cut A-line skirt with side-buttons, and a blouse with a tie-collar and snaps in the side. The skirt is in a lovely faric, it's matka silk! Matka is a plain weave with double strands in both warp and weft. The fabric is coarse and has a lot of body, but at the same time it has a slight slight lustre that's too polite to be called a shine, and even though it has body, it still has some drape. Wonderful!
So how did the skirt fight back? Basically, it was the fabric. When I bought it they said it could be machine washed, but even after a gentle wash with silk-detergent it came out stiff as cardboard. After a good rinse with fabric softener (worked better than vineger, tried both on test squares. And yes, of course I should have machine washed a test square as well...) and ironing it dry, it regained some softness and drape. I'd seriously recommend against machine washing matka, no matter what the salespeople say!
The skirt closes in the side with buttons and handmade buttonholes.
The skirt sits in my natural waist and the waistband is straight, folded. I lenghtened it considerably after looking at old fashion- and pattern magazines, and measuring the few 30s pattern I own, so it hits just below mid-calf.
The blouse is made from leftovers from last year's big dress+jacket project. I used a combination of different patterns I've made before, it took a couple of toilles, and the fit is still a bit off. I have two major issues I need to adress before making it again, first is the bubbliness at the front, second is the excess in the peplum. 30s peplum laid very slim and close to the hips, while the bodice bloused against the waist (opposite that of 50s peplum blouses/dresses). I love the style, though! So easy to wear, cool and soft, not restricting the movement at all, yet with a feeling of elegance.
The blouse closes in the side with snaps.
Second outfit!
Remeber the jerseydress I showed you in the last post? I loved that fabric so much I went back for another 1,5 metre! I had already found a nice linen on a 50% sale, so I figured it would be great to have a 30s outfit that's easier to wash and iron. Hence a linen skirt and a jersey top!
The skirt is tea-dyed (I bought it as a bleached white) and cut on the bias. However, since the first skirt has a tendency to pull a little over the hips I figured it would be better with a bit more room in the skirt and made it just a few cm wider. Unfortunatly, it didn't make the sideseam lay flat, quite the opposite...
Another part in the problem may be that I was a little bit short on fabric, and did a "design feature" at the top. It might be a coincidence that the skirt pulls the most just below the "V", but I doubt it.

Also, the zipper buggled. This is the third installation, and I've done all I can think of. I'm leaving it be, it's time for fall sewing and either the fabric will shrink a little during washing, or I'll wear something over the top of the skirt, or... It's a later problem =)
The top is a version of my by now TNT jerseydress pattern, not much to say about it.
Except that I love the fit in the back!!! With my narrow back, nothing RTW has ever fit and I still get a little giddy everytime I see myself wearing a garment that fits my back =)
This is just a short presentation, I'll be returning soon with some thoughts on drafting patterns that are based on a specific period, and of course a bit more about the silk skirt. It was an epic make ; )
Love, Erika
Tuesday, 11 June 2013
Half-slips!
I fell out of blogging... again... Doing a major clean out after the builders were done renovating my appartement, having my sister here for a week... Blogging - and sewing - got left behind. Of course, having my sister on visit was great, and what's even better is that she's moving back to town at the end of summer! Yay! And the flat does feel better after that huge cleaning-affair =)
MeMadeMay got done all the way to the end, and I'll post a some reflections on a later date. To get me back into the sewing room (finally restored to order I might add) I figured it was time to adress this issue:
I made this slip 4 years ago, in a not very good quality lining fabric. Having yet to figure out invisible zips, and not wanting the bulk of a gathered waist, I inserted an invisible zipper like an ordinary, centered zip. This has actually worked out great, and even though I have a few other slips, this is the one I've always turned to. It's a safe bet to say that for the past 4 years it has been worn at least 250 days/year (the real number is probably higher).
This winter I first started noting it looked worn around the central backseam. Then all of a sudden it went from a little worn to what you can see above! Time to retire this workhorse, and make new slips.
While the zip has worked, at times it has also been a bit uncomfortable. At the same time, a traditional straight slip always makes me feel restricted in movement. So I drafted a pattern from my A-line TNT, widening the waist to eliminate the zip, while keeping a slightly flared hem. First up was this black slip:
I overlocked the inside seams, used an elastic with lace details on the top (underwear elastic) for the waist and made a rolled hem with the aid of my rolled hem foot =)
The result is ok, but the elastic could have been a little snugger around the waist. I wasn't pleased at all with the overlocked seams (and I had carefully adjusted the setting first, testing on scrap material) so...
On this nude version I made french seams on the inside, and this was way better! May sound trickier, but with the whole changing threads and adjusting the overlock, this was actually faster and yielded a nicer result. Both ways of course work!
I used a somewhat shorter elastic for the waist, and added a lace to the hem.
This whole thing came together mercifully quick! The second skirt took 2,5 hours to make, from pressing the fabric before laying out the pattern, to the last pressing of the hemline. I may have to do another one pretty soon... My jersey dresses are shorter than my woven skirts and dresses, and these new slips are too long for them! Luckily, I have just eunough left of the nude fabric to make a second, 5-7 cm shorter slip =)
Ever tried your hand on any kind of lingerie-sewing? Love it, or not a fan of sewing something that won't be seen?
Love, Erika
Thursday, 23 May 2013
Summer SWAP 4, 5 and 6
While pondering 30s fashion, I've been sewing up more jersey-stuff... (the dresses has already been featured, in the MMM on holiday-post).
1) V-necked top. This fabric was a nightmare! It didn't seem to have selvedges, more like cut edges. The printed pattern was parallell to the edges, but the grainline was maybe 20 degrees off. Laying out the pieces took ages, and I still think most pieces are slightly off grain. Pieces of this top will undoubtedly twist during washing. It has very little lengthwise stretch, so the underbustseam is higher than on the floral top from last week.
The whole point however was to test the pattern in a V-neck version. The neckband is not sewed on perfectly, but I do like the style. Not sure this top will survive long in my wardrobe, but it was good to test the V-neck pattern alteration =)
2) I had planned to make a dress in the horrible, off-grain fabric, but after discovering all the problems outlined above, I figured it'd be a waste of time. So I rushed out and got a turqoise viscouse jersey on sale at Ohlssons...
The floral dress was nice, but apart from me messing up the elastic in the waistseam, the entire waistline was too high. Very strange, since the pattern is drafted from my chevron dress that sits great at the waist. Then I got to thinking: the shoulder seams on that one has a tendency to wander backwards. Maybe the surpluce in the front bodice (the one I reduced for this later pattern) was divided between front and back to make the whole bodice longer?
Anyway, I added length a little bit here and there on the dress bodice pattern, altered the sleeves to be loose and half-long, slimmed down the skirt top to reduce the gathered effect, and changed the gathers in bodice and skirt into small pleats, more visible here:
However, this was still just a testrun for...
3) V-necked dress in the lovely jersey I bought at Stockholm sewing expo last fall. This fabric is wonderful! It has drape, a heavy fall, excellent recovery, is not thick and yet it has a bit of body so it doesn't fall all over the place. It cost a dear coin (twice the cost of the turcoise above), but I have a feeling it will last more than twice as long and see a lot of wear.
For me, this is a summer evening dress, or a winter dance dress. It'll be perfect for bluesdancing!
And that concludes the fast and easy part of my summer SWAP =)
Love, Erika
Subscribe to:
Posts (Atom)